
Offer Journey
Last updated
1. Overall Process & Purpose
The Offer Journey in ATS360 represents the system-level structure that is created when a candidate enters the offer phase. It serves as the container that holds one or more individual offer records over time.
The Offer Journey exists to:
- Establish a single, traceable offer lifecycle per applicant
- Group all offer versions, revisions, and outcomes together
- Provide clear visibility into where a candidate stands in the offer process
The Offer Journey provides value by:
- Recruiters: Clearly outlining the Offer process from sending pre-offer documents, seeing how many offers have been created, and sending the final offer letter to be signed.
- Hiring Managers: Making it easy to understand if a candidate is in offer discussion, revision, or final decision
- HR/Admins: Ensuring offer activity is structured, auditable, and consistently recorded
The Offer Journey is created automatically by ATS360. Users do not manually create a journey record; it is initialized through user action.
2. Definitions
Offer Journey A system-managed container that groups all offer-related records and actions for a single applicant.
Offer Record An individual offer instance within an Offer Journey. Multiple offer records can exist within one journey.
Generate Offer The action that initializes an Offer Journey (if one does not already exist) and creates a new Offer Record.
Offer Stage The applicant stage that enables Offer Journey creation and offer-related actions.
Offer Status System indicators that reflect where the applicant is within the offer process (e.g., offer created, offer responded).
3. Step-by-Step Directions
Step 1: Create an Offer Journey
Offer Journeys are created at the job posting level and define how offers and documents will be sent for applicants tied to that job.
- Navigate to the Job Posting record. Edit the record.
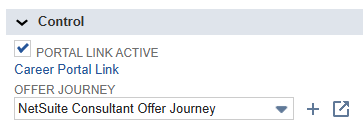
- Locate the Offer Journey field.
- Click Create New Offer Journey (Plus ‘+’ icon).
- Enter a name for the Offer Journey.
- Save the record.
- Click Open next to the Offer Journey field to open the journey you just created.
System Behavior:
- A new Offer Journey configuration record is created.
- The journey is now available to be customized with stages.
Step 2: Add Stages to the Offer Journey
Stages define what actions occur as an applicant moves through the Offer Journey.
- From within the Offer Journey record, click the Offer Journey menu button in the bottom-right corner of the screen.
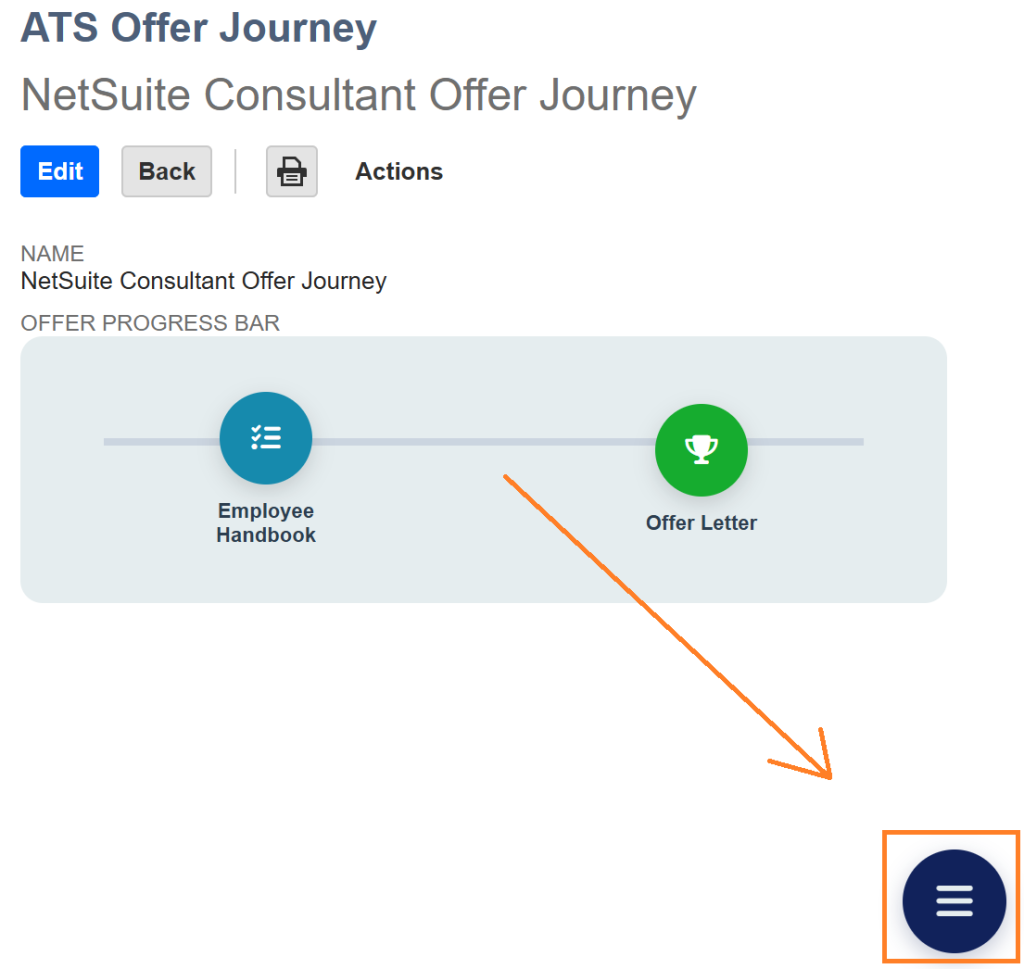
- In the popup, click Edit.
- The Offer Journey editing window opens.
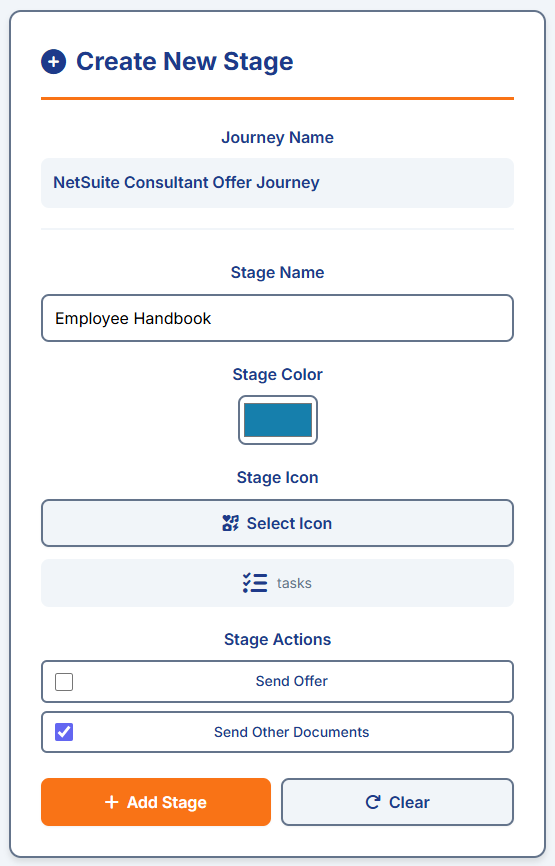
- In the left-hand menu, add a new stage:
- Enter a Stage Name
- Select an Icon
- Define the Stage Action:
- Send Offer Letter only
- Send Additional Documents only
- Send both Offer Letter and Additional Documents
- Click Add Stage.
- Repeat these steps to add additional stages as needed.
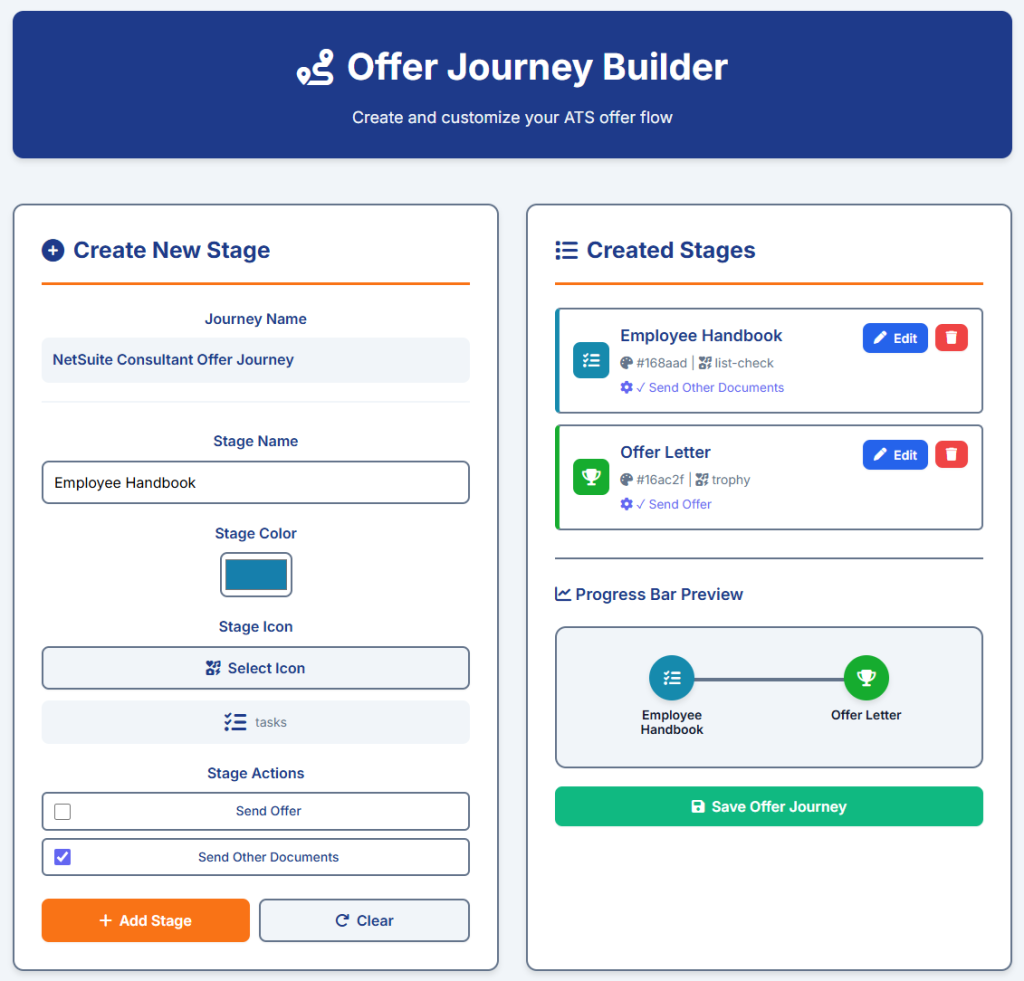
- When finished, click Save for the Offer Journey as a whole.
System Behavior:
- Saved stages appear in the right-hand journey menu.
- Stage actions determine what the recruiter sees later when using the journey.
Step 3: Assign the Offer Journey to a Job Posting
- Navigate back to the Job Posting record.
- Select the newly created Offer Journey from the Offer Journey dropdown field.
- Click Save.
System Behavior:
- All applicants tied to this job posting will now use this Offer Journey when they reach the Offer stage.
Step 4: Start the Offer Stage
Once an applicant associated with the job posting reaches the offer phase:
- Navigate to an application record in the Offer stage.
- Click Send Offer to begin the Offer Journey.
At this point, system behavior depends on how the current Offer Journey stage was configured.
Step 5: Complete Actions for the Current Offer Journey Stage
Path A: Stage Sends Additional Documents Only
If the stage was configured to only send additional documents:
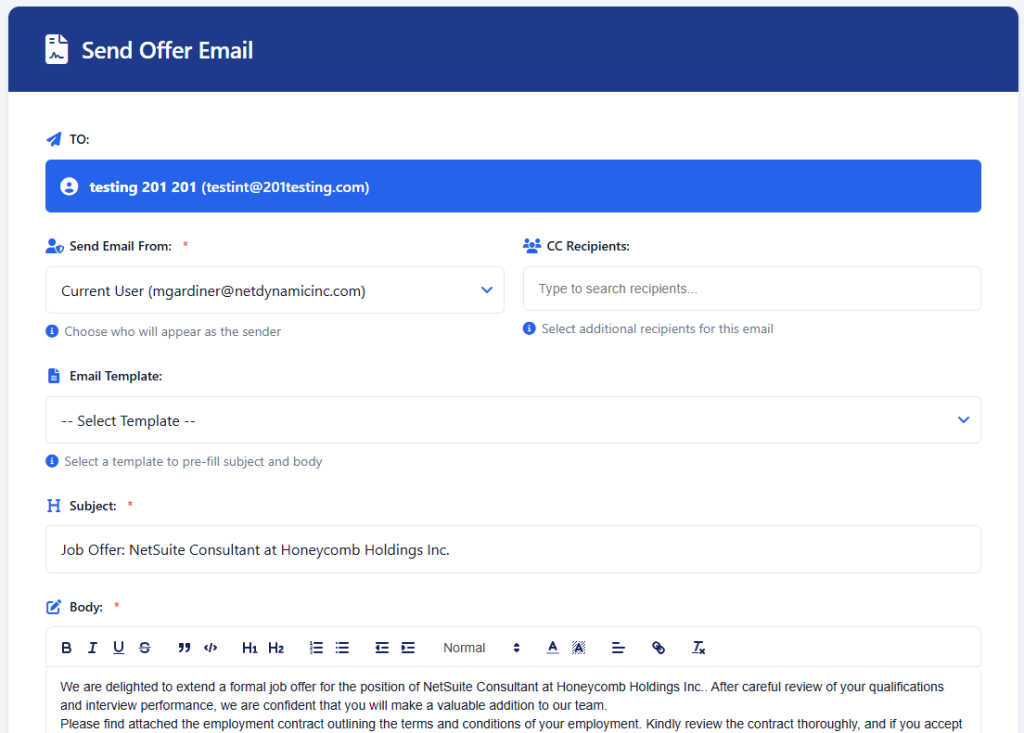
- The system redirects you directly to the Compose Email window.
- Choose to:
- Compose a new email, or
- Select an email template.
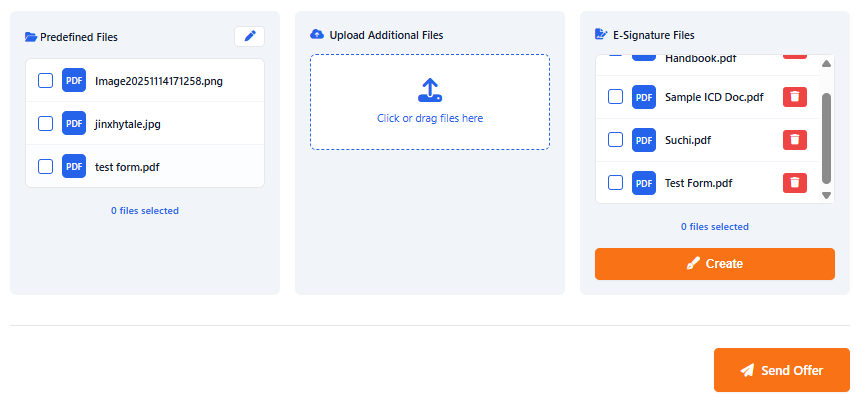
- Attach documents by:
- Selecting predefined documents
- Uploading new documents
- Selecting predefined eSignature documents
- Creating new eSignature documents
- Click Send.
Important:
- Predefined documents and uploaded documents are not eSigned and are sent as standard email attachments.
Path B: Stage Sends an Offer Letter (With or Without Additional Documents)
If the stage was configured to send an offer letter, or both an offer letter and additional documents:
- The system redirects you to a new Offer Record.
- Complete the Offer Form fields.
- This follows the same process as the base Offer Stage.
- Refer to the Offer Stage article for a detailed explanation.
- Click Save.
- Click Generate PDF and review the offer letter.
- Edit the offer if needed and regenerate the PDF.
- Click Create eSignature.
After creating the eSignature for the Offer Letter:
- You are redirected to the Compose Email window.
- Compose the email or select a template.
- Attach additional files as allowed by the stage configuration:
- If the stage allows additional documents, you may select predefined eSignature documents or create new ones.
- If not, only predefined documents and uploaded files are available.
- Click Send.
Important:
- Predefined documents and uploaded documents are not eSigned.
- The offer letter eSignature document is always included automatically.
Step 6: Applicant Completion and Stage Progression
- The applicant receives the email and completes any required eSignature documents.
- Once all required documents are signed:
- The applicant record is automatically updated.
- The recruiter can move the applicant to the next Offer Journey stage.
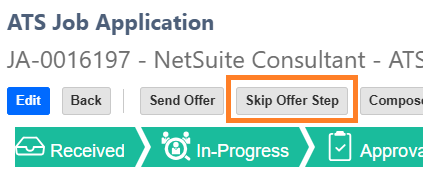
If a stage is not required for a specific applicant:
- Click Skip Offer Stage to move directly to the next stage in the Offer Journey.
System Behavior:
- Skipped stages are recorded but do not block progression.
Optional Step: Creating an eSignature Document
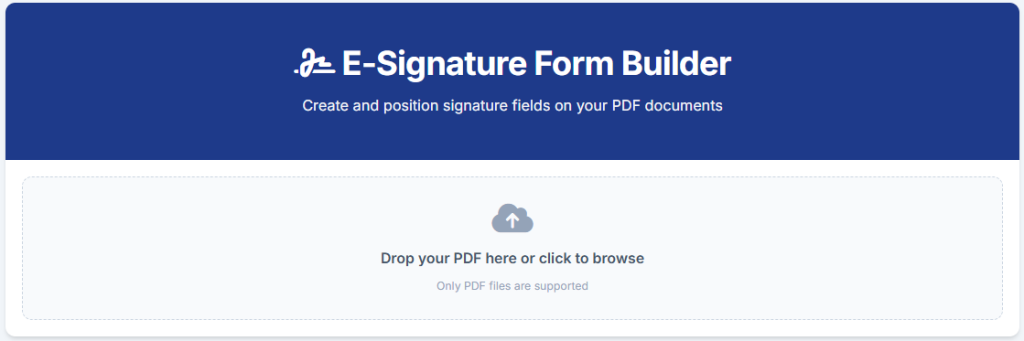
Whenever a recruiter needs to prepare a document for digital signing—whether initializing an Offer Letter from the ATS Offer record or creating a new eSignature document like an Employee Handbook while composing an email —the system utilizes the eSignature Form Builder.
1. Initialize the Document
- For Offer Letters: The document auto-loads when you click Create eSignature (or Set Up eSignature) from the ATS Offer record.
- For Additional Documents: Click Create within the e-signature Files section of the Send Offer Email window.
- Upload: If starting a new document, upload the PDF.
- Navigation: Use the buttons at the top of the screen to move between pages of multi-page documents.
2. Open the Tools Menu
- Once a PDF is uploaded or loaded, open the Tools menu on the right side of the screen by clicking the blue arrow.
- Form Name: Type an internal e-signature form name to identify the document in the system.
3. Configure Signers and Signing Order
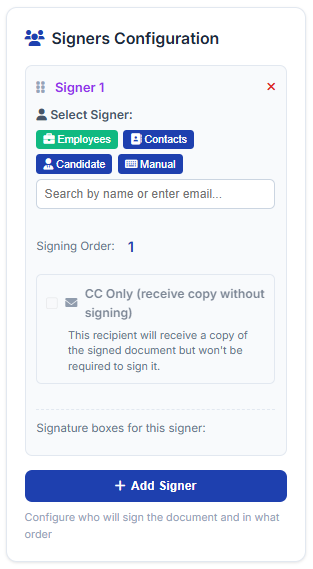
- Navigate to the Signers Configuration section.
- Add Signer: Click Add a Signer and select the recipient type.
- Options include: Employee, Contact, Candidate, or manually typing a name/email.
- Signing Order: If there are multiple signers (e.g., an Employee must sign before the Candidate), click and drag the signers within the sidebar to set the desired sequence.
- CC Only: Check this box if a person only needs to see the document and does not need to sign it.
4. Place and Customize Fields
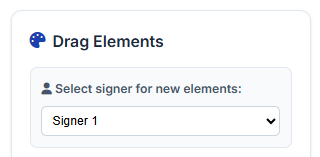
- Navigate to the Drag Elements section and select a specific signer from the dropdown menu.
- Field Types: Click and drag any of the four available fields onto the document:
- Signature: Renders the name in a stylized cursive font.
- Timestamp: Adds a date/time for the signature.
- Print Name: Adds the name in plain text.
- Initials: Adds a field for short-form verification.
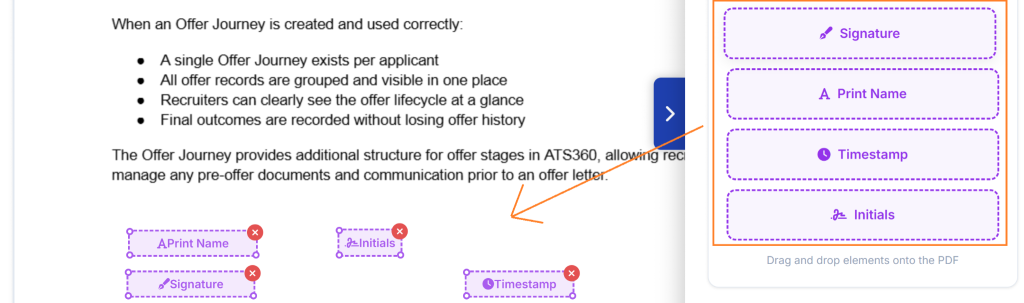
- Field Adjustments: Once placed, click a field on the document to:
- Resize/Move: Adjust the box to fit the document's lines.
- Font Size: Under the Preview section in the sidebar, manually or automatically adjust the font size.
- Show Preview: Click Show Preview to see how the signed field will look.
5. Save and Finalize
- After setting up fields for all signers, click Save Form at the bottom of the screen.
- System Behavior:
- The system redirects you to the Send Offer Email window.
- Standard Documents: These are added to the e-signature files list for future use.
- Offer Letters: The specific instance appears in the Related Offer field and is automatically attached to the outgoing email.
4. Summary of Outcome
When an Offer Journey is created and used correctly:
- A single Offer Journey exists per applicant
- All offer records are grouped and visible in one place
- Recruiters can clearly see the offer lifecycle at a glance
- Final outcomes are recorded without losing offer history
The Offer Journey provides additional structure for offer stages in ATS360, allowing recruiters to manage any pre-offer documents and communication prior to an offer letter.