
Rejecting a candidate
Last updated
1. Overall Process & Purpose
What This Process Does
The Rejection Process allows recruiters to formally remove an applicant from the hiring workflow at any stage. It captures the reason for rejection, optionally records additional notes, and supports sending a rejection email to the applicant.
Why This Process Exists
The rejection process exists to:
- Ensure applicants are closed out intentionally and consistently
- Capture structured reasons for rejection
- Maintain a clear audit trail for hiring decisions
- Support professional, timely communication with candidates
Value Provided
- Recruiters can close applications cleanly with minimal effort
- Hiring Managers gain visibility into rejection rationale
- HR benefits from reporting-ready rejection data and compliance support
2. Definitions
| Term | Definition |
|---|---|
| Reject / Void | Action that removes an applicant from the workflow |
| Rejection Reason | Required dropdown selection explaining the rejection |
| Rejection Notes | Optional free-text explanation |
| Rejection Email | Optional email notifying the applicant of rejection |
| Rejected Stage | Final state for rejected applicants |
3. Step-by-Step Directions
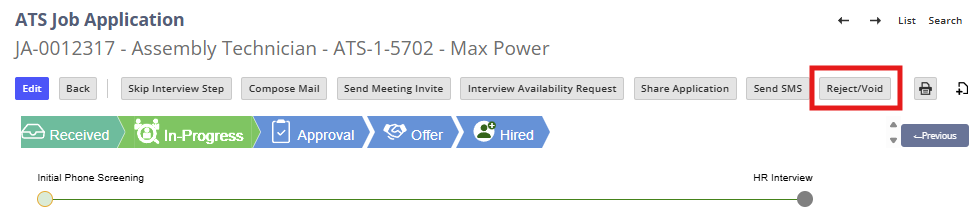
Step 1: Initiate the Rejection
- Open the applicant’s Job Application
- Click Reject / Void
You will be prompted to begin the rejection workflow.
Step 2: Select a Rejection Reason
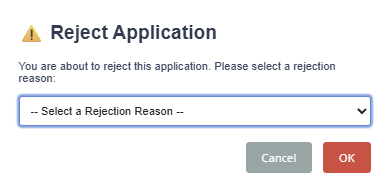
- Choose a Rejection Reason from the dropdown
System Behavior
- Rejection reasons are company-configured
- This selection is required to proceed
Step 3: Add Rejection Notes (Optional)
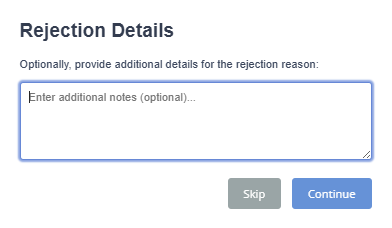
- Enter additional notes explaining the decision
- Click Continue
Optional Action
- Click Skip to proceed without notes
Step 4: Choose Whether to Send a Rejection Email
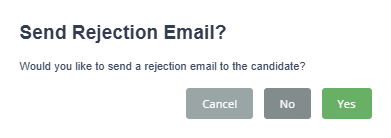
You will be prompted to choose:
- Yes — Send a rejection email
- No — Do not send an email
- Cancel — Exit the rejection process
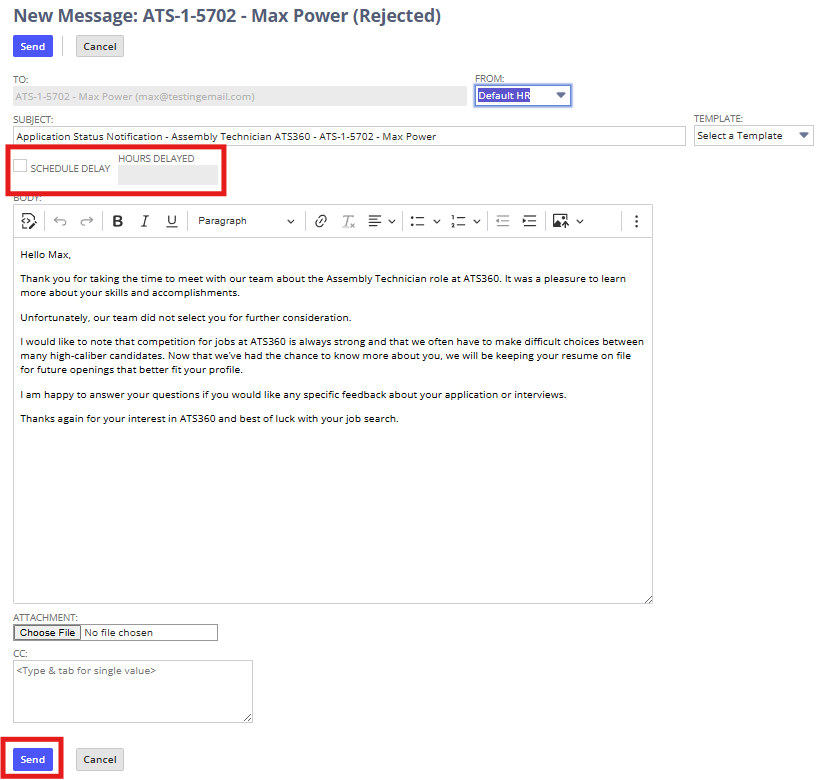
Step 5: Review and Send Rejection Email (If Selected)
If Yes is selected:
- Review the pre-populated rejection email template
- Optionally:
- Edit subject or body
- Select a different rejection template
- Add attachments
- CC recipients
- Optional: Enable Schedule Delay and enter delay hours
- Click Send
Step 6: System Finalizes Rejection
After completion:
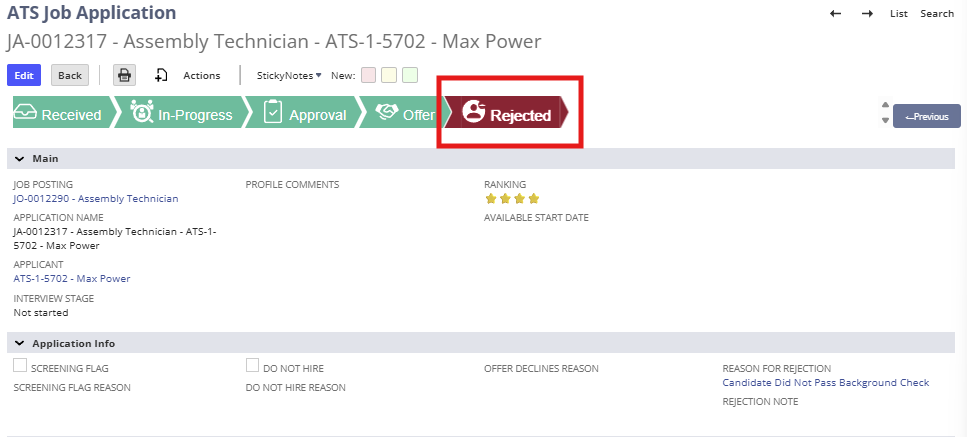
- Applicant moves to the Rejected stage
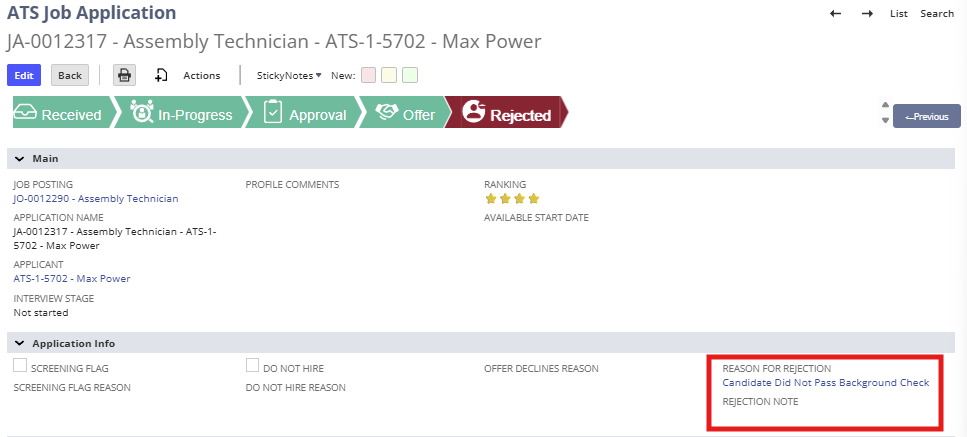
- Rejection reason and notes are saved
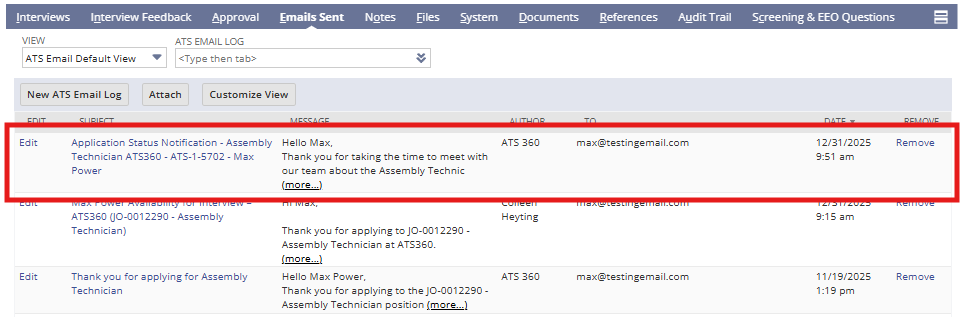
- Email activity is logged in Email Sent
- Rejection date is recorded on the application

4. Summary of Outcome
When the Rejection Process is completed correctly:
- The applicant is formally removed from the hiring workflow
- Rejection reasons are captured for reporting and audit
- Optional candidate communication is documented
- The application record remains searchable and traceable
The Rejection Process ensures professional closure, data integrity, and transparency within ATS360.